
In this post, you will learn about each Sewing machine parts name with pictures. In addition, I have tried to explain what each part does.
For better clarity, I am going to refer to both mechanical and electrical sewing machines.
Additionally, I will frequently use these words, so you should be familiar with their meanings.
- Mechanical – Old treadle machine.
- Electrical – a modern sewing machine.
- Both refer to the electronic and mechanical.
Understanding each part of the sewing machine and how they function is beneficial, especially for beginners. This knowledge can be invaluable when troubleshooting issues, as it enables easier communication for seeking alternatives or solutions at the shop.
Similar to how the human body is categorized, the mechanical sewing machine also breaks down into three parts.
Categories of the sewing machine parts names.
- Head part.
- Bed part.
- Stand part.
Without any delay, let’s Look.
Head part
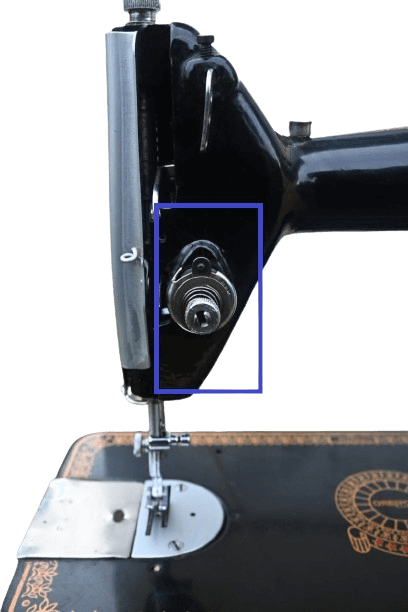
1&2) Balance wheel and stop motion screw.
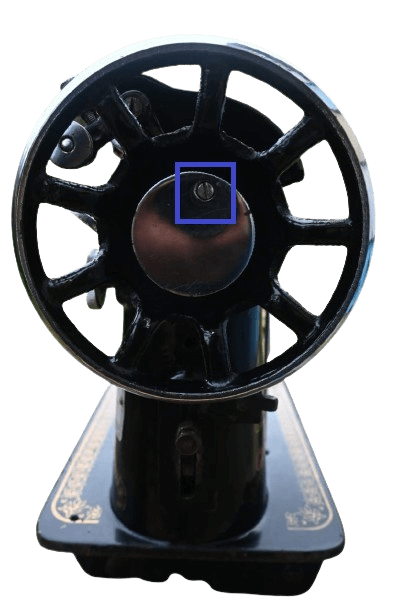
In Mechanical: The handwheel is typically located on the right side of the sewing machine. Despite its small size, it plays a crucial role in controlling the start and stop motion of the sewing machine, and it is operated manually.

In Electrical: Similar to mechanical machines, the handwheel on electric sewing machines is also typically located on the right side. However, it is not used for starting and stopping because of its electric operation. Instead, you can use it to adjust the needle position (up and down) while sewing.
Stop motion screw.
In Mechanical: Inside the balance wheel, you can find a screw. Loosening this screw prevents the machine’s parts from operating, thus preventing sewing until the screw is tightened again. This mechanism is useful for preventing unintended operation when the machine is not in use.
In Electrical: In this machine, this screw is located in the same position as the mechanical one.
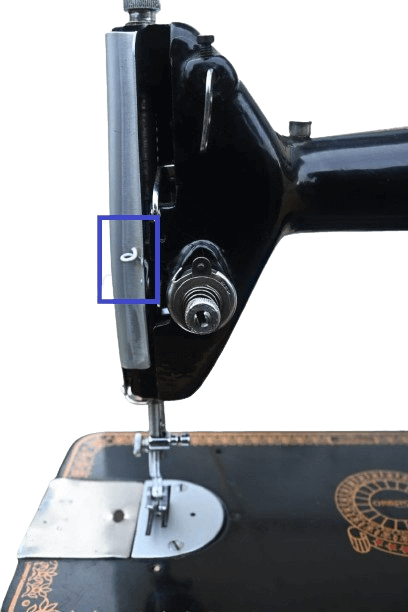
3) Bobbin Winder.
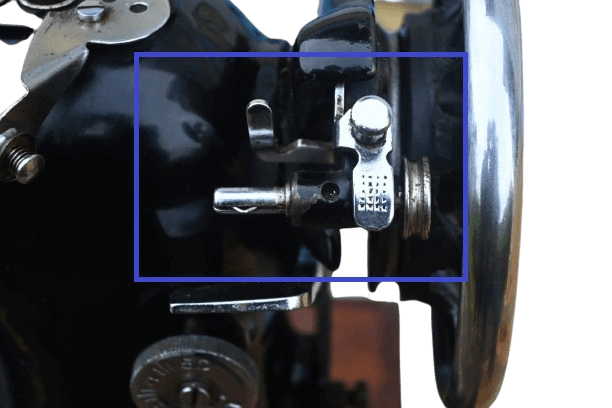
In Mechanical: Near the balance wheel, you can find the mechanism that helps to wind the thread onto the bobbin. First, insert the bobbin into the iron part and press the small curved steel piece. Then, run the machine to spin the thread onto the bobbin.
In electrical: The spinning process is not complicated like with mechanical machines because this one has an automatic bobbin winder located near the balance wheel.
Simply insert the bobbin into the designated hook and slide it to the right side. Ensure the thread connects from the spool pin to the bobbin.
4) Bobbin winder rubber.
In mechanical: You can find this rubber in the bobbin winder. After inserting the bobbin, you need to run the machine, and this rubber will contact the balance wheel, creating friction. This process helps wind the thread onto the bobbin inside.
In electrical: It doesn’t have this type of rubber because of the automatic bobbin winder.
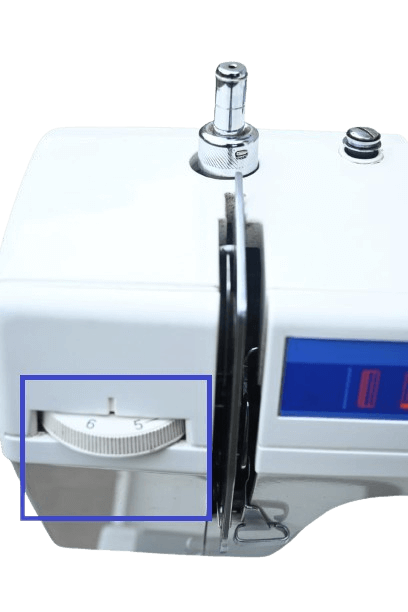
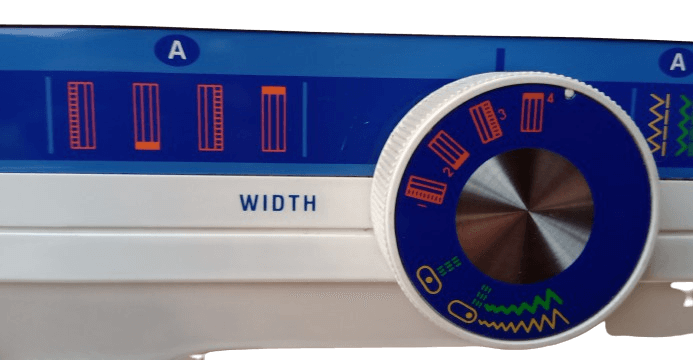
5&6) Stitch regulator or Scale screw and Reverse stitch selector.
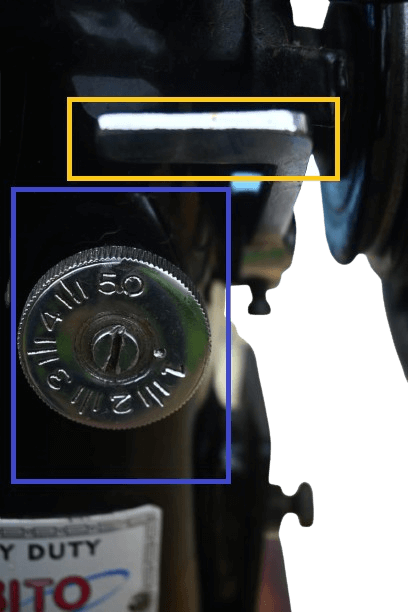
In mechanical: Commonly, it appears on the right side of the machine, though its location may vary in some sewing machines. Typically, it is found near or underneath the bobbin winder. It features numbers ranging from 0 to 5, which indicate the stitch width. Position 2 provides a small stitch, position 3 a medium stitch, and positions 4 and 5 larger stitches.
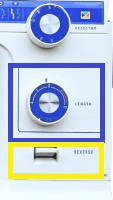
In electrical: It’s also referred to as a stitch width selector in this type of sewing machine. The same concept as in the mechanical machine applies here as well.
Reverse stitch switch or selector.
In mechanical: This switch is located near or above the stitch selector.
Mainly, it is used for stitching in reverse, which helps reinforce stitches, particularly useful for tasks like hemming pants.
In electrical: The same function applies here, along with other uses.
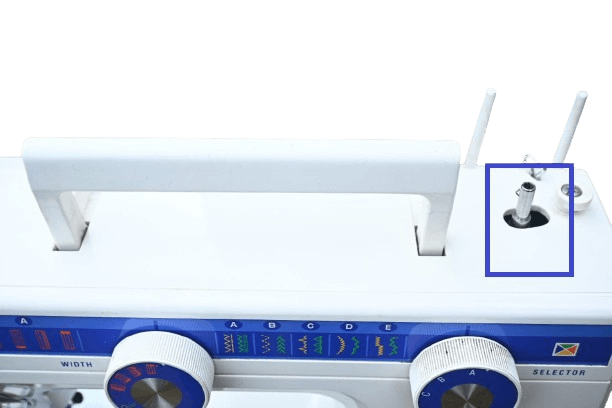
7) Spool pin.
In mechanical: Typically, the spool pin is located in the middle of the machine. Its purpose is to hold and feed the thread evenly to the sewing machine. Additionally, if desired, you can use an external spool pin.
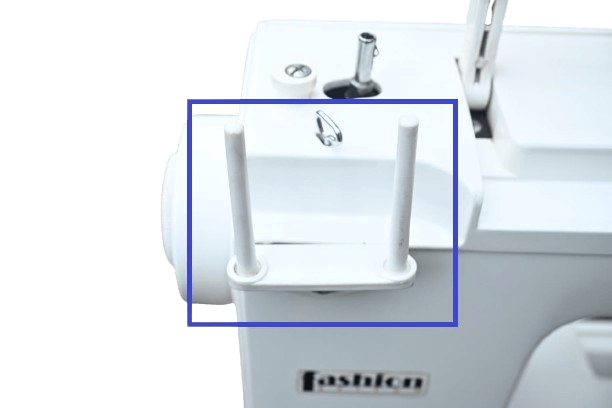
In electrical: The location of the spool pin may vary depending on the sewing machine brand. It could be located behind the bobbin winder or in the centre of the machine. Regardless of its placement, its function remains the same as in mechanical machines.
7) Tension disk.
In mechanical: The tension disk can be found on the left side of the machine. This disk is crucial for determining stitch quality because achieving a proper and even stitch is essential. This ensures that the bottom and top stitches are consistent and solid. Adjusting the tension properly is necessary for achieving good stitches.
The mechanism behind the tension disk involves two concave disks set together with their curved sides facing each other. These disks hold the thread, and the tension of the thread can be adjusted using a spring and screw mechanism.
For a smooth stitch, the tension should set middle level.
In electrical: Instead of a screw and spring, it has a selector. The lower number specifies a looser stitch, while the higher number indicates a tighter stitch. For optimal results, it’s recommended to choose between numbers like 3 to 6. For example, setting it at five provides a good tension level.
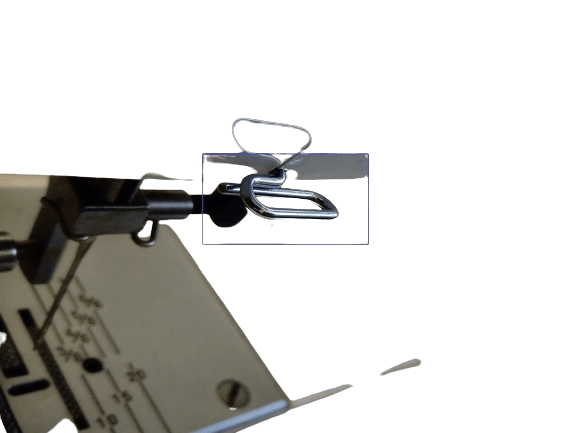
8 & 9) Take up lever and Eyelet.
In Both: It is located near the tension disk. This component’s job is to feed the thread evenly based on the selected stitch width.
Eyelet.
In Both: It is situated on the left side of the machine (one of the parts of the take-up lever). The role of this part is to feed the thread evenly during sewing. The eyelet is a component that holds the sewing thread coming from the spool, tension disk, and thread guide.
10) Thread guide or Guard.
In mechanical: It is found near the needle and looks like a small, curved, thin piece of steel. Its job is to hold the thread that comes from the eyelet.
In electrical: It may exist near the needle or the tension disk, depending on the brand of the sewing machine.
11) Pressure foot.
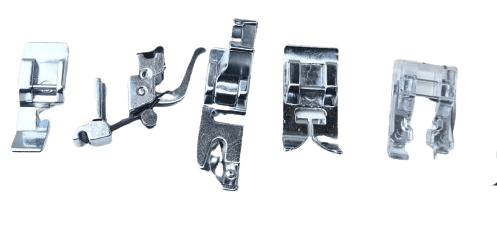
In both: I think you all know about this thing. It is one of the central components of every sewing machine.
As I already mentioned in my best sewing machine list that states without a different type of presser foot, you can’t do various stitches.
In both types of a machine, it is located under the needle or above the feed dog.
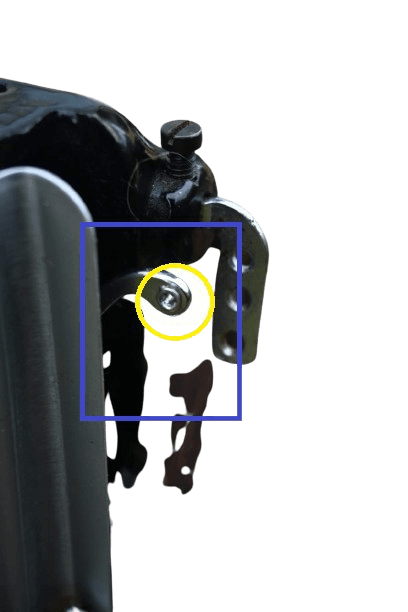
12) Pressure foot bar with a screw.

In both: It is positioned behind the needle bar, and its job is to secure the presser foot tightly while sewing using a small screw.
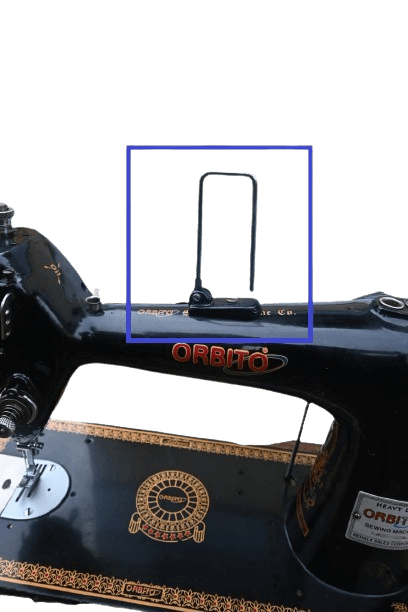
13) Pressure foot lifter.
In both: Usually, in all types of sewing machines, this lifter is positioned on the backside and is accessible by hand. Its job is to hold the fabric securely while sewing. It’s important to lower the lifter when stitching.
14&15) Needle bar with Clamp.
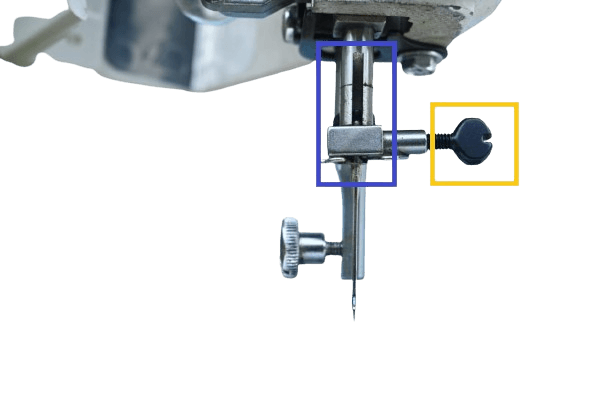
In both : This steel bar’s job is to secure the needle with a clamp. As mentioned earlier, if you loosen the stop motion screw, it will prevent the machine from operating.
Improper arrangement of the needle bar can potentially damage the shuttle or cause the needle to fail to pull the thread from the bobbin. This issue is mainly applicable to mechanical machines, as I haven’t experienced similar problems with the needle bar in electric sewing machines.
Needle clamp.
In both: As mentioned earlier, this attaches to the needle bar and its job is to secure the needle tightly.
16) Faceplate.
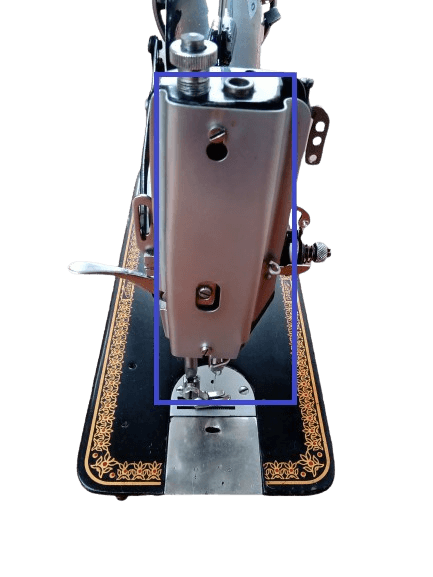
In mechanical: It is located on the left side of the machine and is made of stainless steel. This faceplate helps protect the sewing machine from dust and stains.
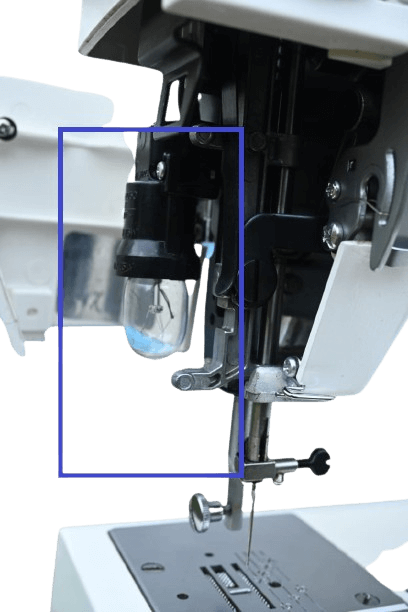
In electrical: Also situated on the left side, its job is the same, but here you can find an additional feature called the “sewing light”.
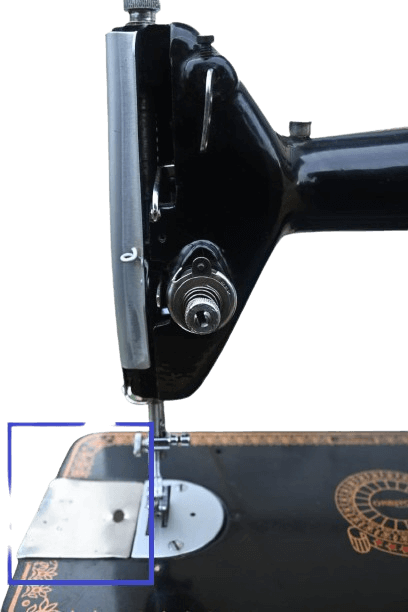
17) Needle or thread plate.
In both: You can find the thread plate under the presser foot. It may appear as a half-circle or a square and can vary in design among different sewing machines.
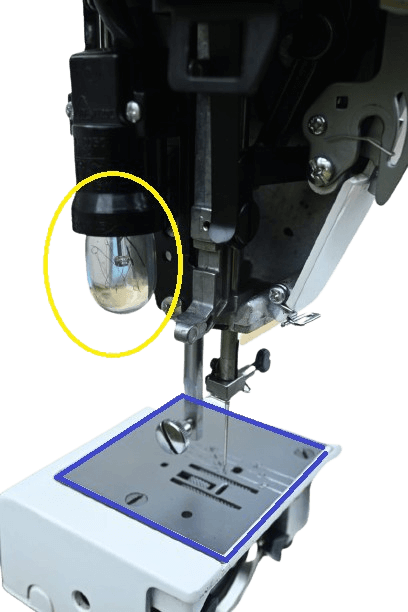
The thread plate has tiny holes and gaps that accommodate the needles and teeth. Its function is to protect the feed dog and shuttle part of the sewing machine.
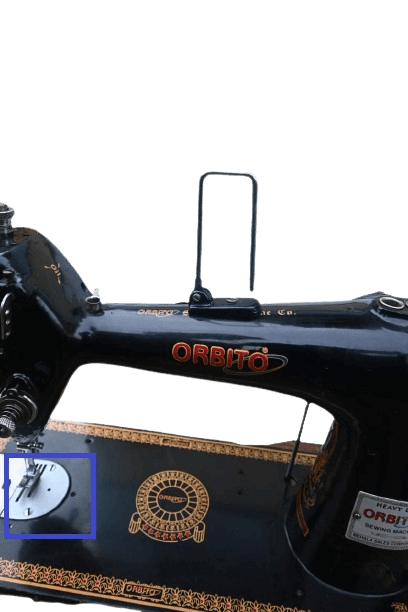
18) Side plate.
In mechanical: It’s located near the thread plate. It is removable for inserting the bobbin and also serves to protect the inner parts from dust.
In electrical: Most electronic machines don’t have this plate due to a storage box. However, some premium machines include it for inserting the bobbin.
Certainly! If you’re wondering how to insert the bobbin, similar to removing the plate in a mechanical machine, you’ll need to remove the storage box. After that, you can insert the bobbin.
19) Arm shaft rod.
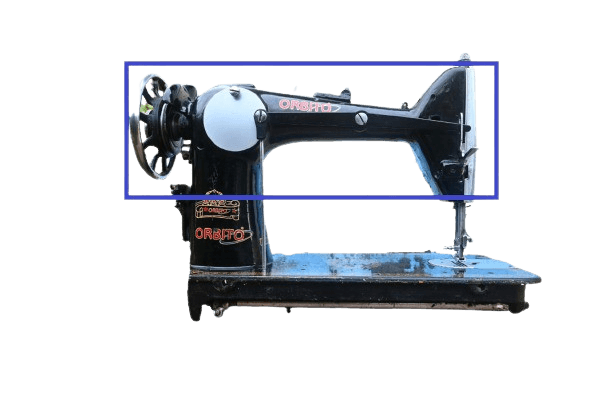
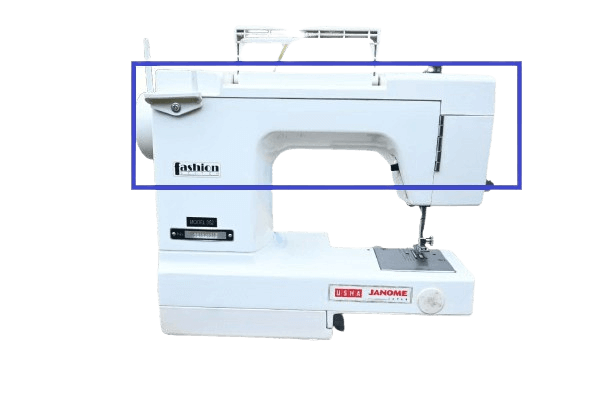
In both: The arm shaft is a component that internally connects the left and right sides of the sewing machine. In mechanical machines, it is usually covered with iron, whereas in electric machines, it is covered with plastic. This part is commonly referred to as the “arm” of the sewing machine.
21) Buttonhole selector.
In electrical: This feature only exists in electric machines for convenient use. It is used for stitching buttons. The buttonhole process varies among different machines. For instance, the Janome Dream Stitch has 1 stage, while the Usha Janome Fashion Stitch has four stages.
22) Cord Pluging Area
In electrical: The power cord insertion point is where you plug in the cord to start your sewing machine. In electric machines, this point can be found on either the left or right side, with its exact location varying by brand. However, in a treadle machine, you won’t have a power cord or need to worry about this feature, as it’s manually operated.
Bed part
1) Feed dog
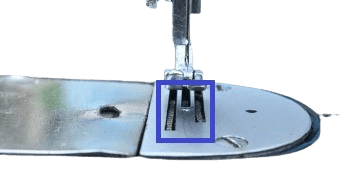
In both: One of the key components in a sewing machine is the feed dog. You can find this under the needle plate. It’s also referred to as the teeth of the sewing unit because its design resembles actual teeth.
It plays a crucial role in sewing by moving or pushing the fabric forward with a rotating motion.
Moreover, you can cover this part with a special plate or leave it exposed while doing embroidery because free motion is essential for embroidery.
2&3) Shuttle-carrier with driver.
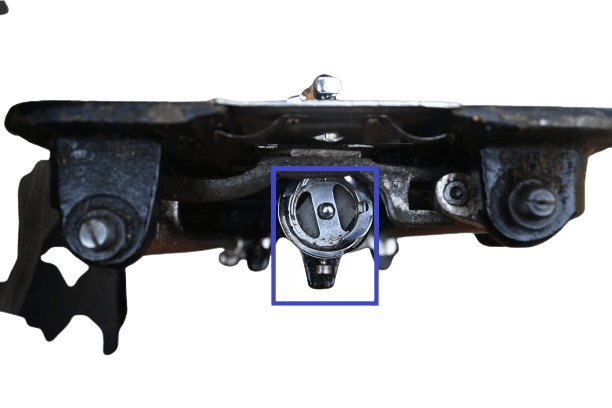
In both: Maybe you’re wondering because I’ve mentioned twice already about the “shuttle”. You can find it underneath the feed dog. It is a part that includes the shuttle race, bobbin, and bobbin case.
Shuttle driver.
In both: The shuttle carrier is a component that houses the shuttle, and it is not removable like the shuttle race. The shuttle inside the carrier spins in a half-circle, which corresponds to the motion of the shuttle race. Together, these components facilitate the sewing machine’s stitching process.
4) Shuttle race.
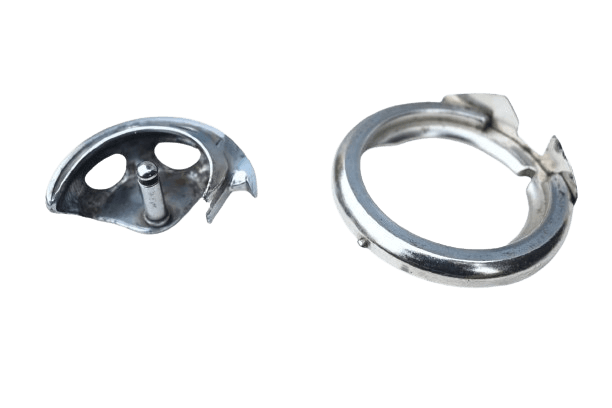
In both: The shuttle race is a component that spins in a half-circle due to its design. One end of the shuttle race is shaped sharper, resembling a needle.
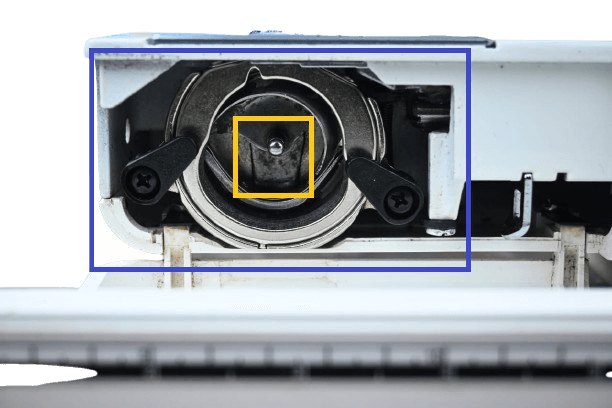
5) Bobbin and Its case.
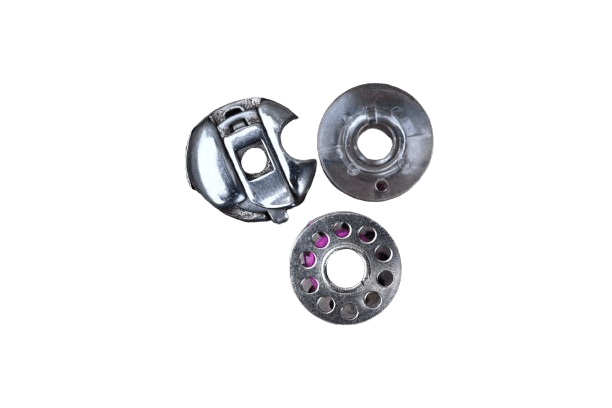
In both: The bobbin and the bobbin case are separate parts that fit together, with one inside the other. It’s crucial to wind the thread correctly on the bobbin, as improper winding can result in improper stitches.
To adjust the thread tension, you need to use the small screw located on top of the bobbin case, as proper thread tension is crucial for ensuring smooth needle pulling and stitch quality.
Stand part.
The stand part is exclusive to treadle machines. The following sections do not apply to electronic sewing machines.
One of the main advantages of an electric sewing machine is that you can use it on any table.

1) Side stand.
These two iron parts are called side stands. They hold the sewing machine’s wooden board in place.
2) Centre frame.
This frame is a part that connects both side stands together.
3) Treadle part.
I think everyone knows its job, though it is located under the central frame. By pressing or pushing this piece, the machine starts to run.
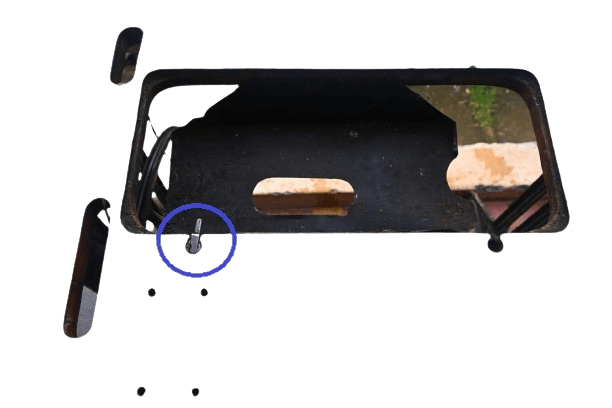
4) Plank.
A plank is a wooden board. The head of the sewing machine fits in the middle of it. The board is higher on the left side to provide comfort when sewing clothes, and the surface is small enough on the right side to hold scissors.
5)Band wheel.
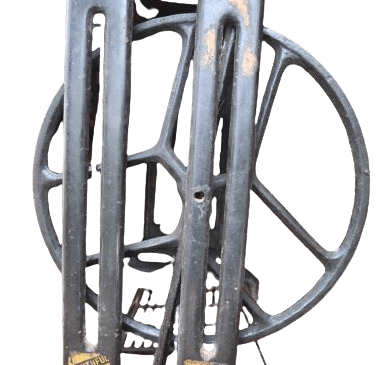
The large wheel on the right side of the side stand is called a band wheel. You need to insert the belt into the concave part of this wheel.
6) Pickman rod.
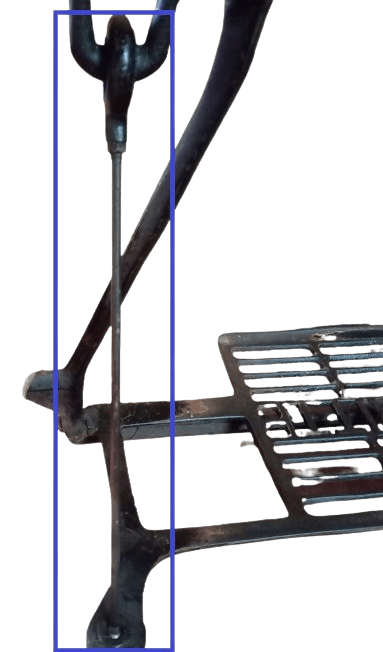
The rod that connects the band wheel and the treadle part is called a Pickman rod.
7) Crank.

It looks like a “U” shape. You can find this on the pitman rod.
8) Dress Guard
Dress guards prevent dresses from getting caught in band wheels. They resemble window grills.
9) Belt.
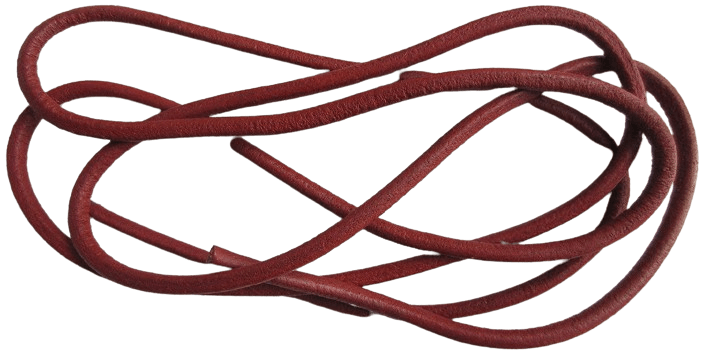
The belt used in the sewing machine is typically made of leather. Its purpose is to connect the balance wheel and the band wheel. Proper tension in the belt is crucial for the sewing machine to function correctly. If the belt is too loose, it can slow down sewing speed, and if it’s too tight, it can hinder smooth operation. Adjusting the belt tension is important for achieving optimal sewing performance.
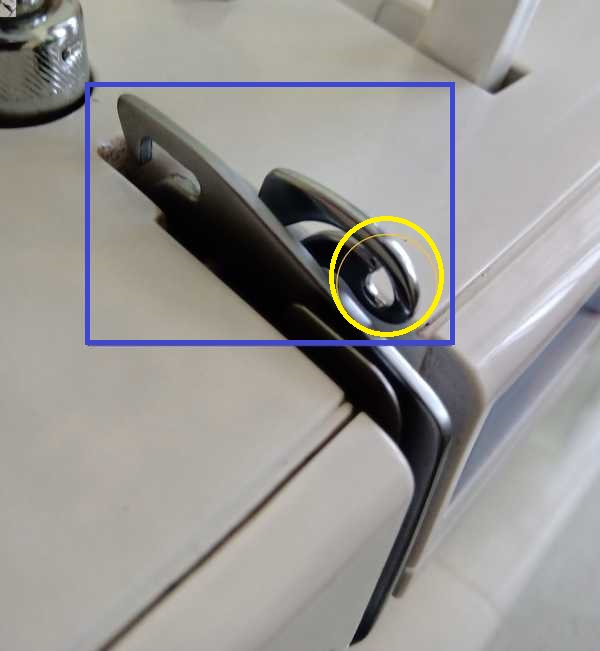
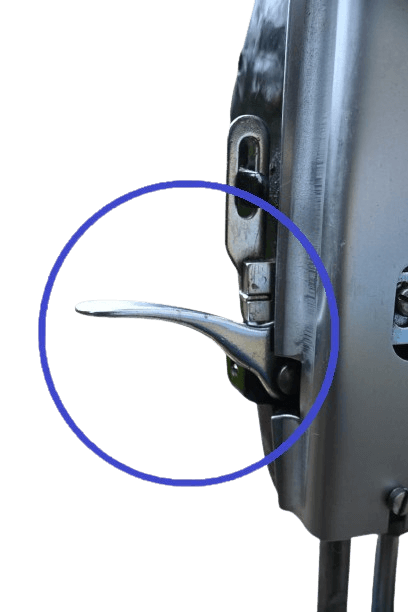
11) Hinges.
The hinges are components that connect the sewing machine head to the board part. Their primary function is to secure the head in place and prevent it from moving or shifting while sewing on the board. This stability is essential for accurate and controlled sewing.
Wind-Up
I hope you enjoy this post. I believe that I have covered everything about Sewing machine parts names with pictures. All the images are taken by Which One is the best?). The machine brands that I used for images are Usha, Singer, Merrit and Orbito.
Have a good day!